Wondering how to tank a basement effectively? This guide demystifies the process, enabling you to transform your damp basement into a dry, durable space. Without too much fuss, we’ll cover the essentials of waterproofing, preparation, and the actual tanking steps you need to follow for success. Dive in to safeguard your home’s foundation and expand your living area.
Key Takeaways
- Basement tanking, a vital waterproofing measure, involves applying membranes or coatings to prevent water ingress, increase structural integrity, and transform damp basements into functional spaces.
- The choice of waterproofing method—Type A (Barrier), Type B (Structurally Integral), or Type C (Drained)—depends on factors like wall stability and ground conditions. Cementitious tanking slurry is popular for stable areas, while cavity drain systems suit spaces at higher risk of movement.
- Proper maintenance, including regular inspections and dealing with hydrostatic pressures using measures like sump pumps and vapour barriers, is essential in ensuring the longevity of a waterproofed basement.
Understanding Basement/Cellar Tanking
Basement tanking, referred to as ‘Type A’ waterproofing within the industry, involves applying a moisture-proof membrane or layer to the inside or outside walls of a building in order to block water ingress. By establishing this type of damp-resistant barrier, basement tanking effectively transforms wet and unviable basements into spaces that are dry and suitable for use.
What is Basement Tanking?
The technique of basement tanking is aimed at creating a water-resistant barrier on the walls and floors of a basement. This goal is accomplished by applying a specific waterproof membrane or layer onto these surfaces directly. At the heart of this method lies the tanking slurry, composed of cements, aggregates, and chemical additives engineered to inhibit the penetration of water. The efficacy with which tanking slurry blocks water ensures that basements remain dry and safeguarded.
Not only does incorporating tanking materials ward off moisture in walls, but it also fortifies the essential junction where floor meets wall in a basement space, thus preserving its structural soundness.
Why Tank Your Basement?
The integrity of your home’s structure is the cornerstone of its longevity, and taking steps to protect it should be a top priority. Implementing basement tanking can act as a protective measure for your home by accomplishing several key objectives.
- It stops water from seeping in and causing damage to the building materials
- It increases the market worth of your property
- By waterproofing, you make new habitable space available within your home.
When you undertake basement waterproofing, what was once an area plagued by moisture becomes transformed into a dry and usable space that has the potential not only for practical use but also for luxurious living enhancements.
Choosing the Right Waterproofing Method and Cavity Drain System
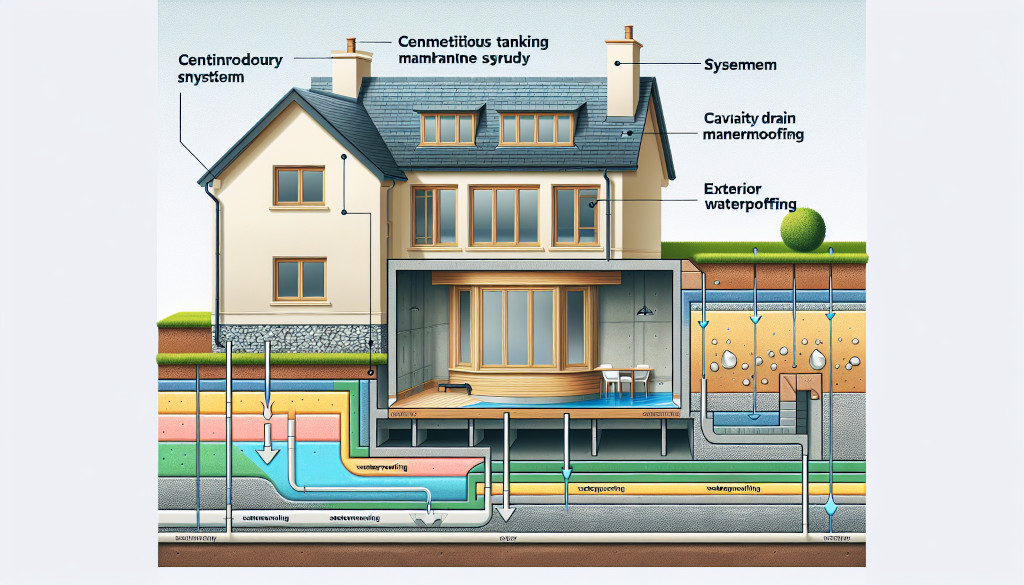
Choosing the right basement waterproofing technique is just as important as performing the actual waterproofing. According to BS 8102, there are three main methods: Type A (Barrier), Type B (Structurally Integral), and Type C (Drained) systems, each with its own distinct characteristics and points of consideration. Factors such as wall stability, soil conditions, and weather patterns must be taken into account when deciding on a method for basement waterproofing.
Cementitious Tanking Slurry for Cellar Walls
A common method for Type A waterproofing involves employing a cementitious tanking slurry. This compound is made up of Portland cements, aggregates, and special chemicals that work in unison to block water ingress into a basement. It offers a strong option for ensuring the dryness of below-ground spaces, particularly where there’s little threat of shifting or sinking.
Cavity Drain Membrane Systems
For spaces with poor wall conditions or a higher risk of movement, a cavity drain membrane system, a Type C waterproofing method, might be the better choice. These systems, often used in conjunction with a damp proof membrane, are ideal for incorporating waterproof membranes in:
- Retrofit projects
- Basement conversions
- Renovations
- New constructions in areas with high water tables or a history of flooding.
They work by channelling water that enters through the membrane to a sump pump chamber or drainage outlet, ensuring effective water management and reducing the risk of water damage.
Exterior Waterproofing
Creating a moisture barrier around the outside of a basement is an effective approach known as exterior waterproofing. This method is particularly beneficial in regions that frequently experience substantial rain or are at risk of flooding, and it provides a durable defence against water damage.
Although investing in exterior waterproofing might initially seem costlier when compared to interior techniques, its ability to forestall expensive repairs related to foundation issues over time renders it a valuable investment.
Preparing Your Basement for Tanking
Before beginning the tanking procedure in your basement, it is critical to prepare properly. The preparation steps include:
- Conducting a detailed examination of the basement to determine the precise reasons for moisture presence
- Stripping away any plaster that has been compromised
- Addressing mould and fungal growths
- Making sure there is unobstructed access to all wall surfaces and clearing out the floor area
- Effectively treating damp walls to avoid subsequent complications
The effectiveness of a tanking system relies greatly on meticulous groundwork.
Removing Obstructions and Damaged Materials
To prepare your basement for cellar tanking, begin by eliminating any obstacles and deteriorated materials. This encompasses the removal of items like shelves and cupboards that might impede access to walls or floors.
You’ll need to strip away any damaged plaster, renderings, paint or previous coatings on the walls along with scraping out old mortar joints until reaching the underlying masonry structure.
Treating Mould and Fungus
Any existing mould should be removed from the cellar walls before the waterproofing process begins. Mould can compromise the integrity and effectiveness of the waterproofing, therefore, it’s crucial to treat and remove any mould growth prior to applying tanking slurry.
Repairing Cracks and Sealing Joints
In preparation, it is crucial to locate and repair any fissures present in the floors and walls of your basement. It’s essential to seal all joints effectively as a defence against water entering the area.
To avoid water penetration at the juncture where the wall meets the floor—a typical entry point for moisture—it is recommended that you form a fillet joint by blending tanking slurry with sand into a dense mixture and then applying this smoothly curved barrier along this critical intersection.
Step-by-Step Guide to Tanking Your Basement
At the crucial intersection of the wall and floor, the application of tanking slurry work plays a pivotal role in treating damp walls. A comprehensive waterproofing system is implemented to fortify this junction, preventing water ingress and ensuring long-term structural integrity.
The incorporation of tanking slurry work is a strategic component of the waterproofing system, effectively addressing dampness and enhancing the resilience of the building against potential water-related issues.
This careful integration of waterproofing measures at the wall-floor junction stands as a reliable solution, safeguarding structures and providing a robust defence against the damaging effects of moisture.
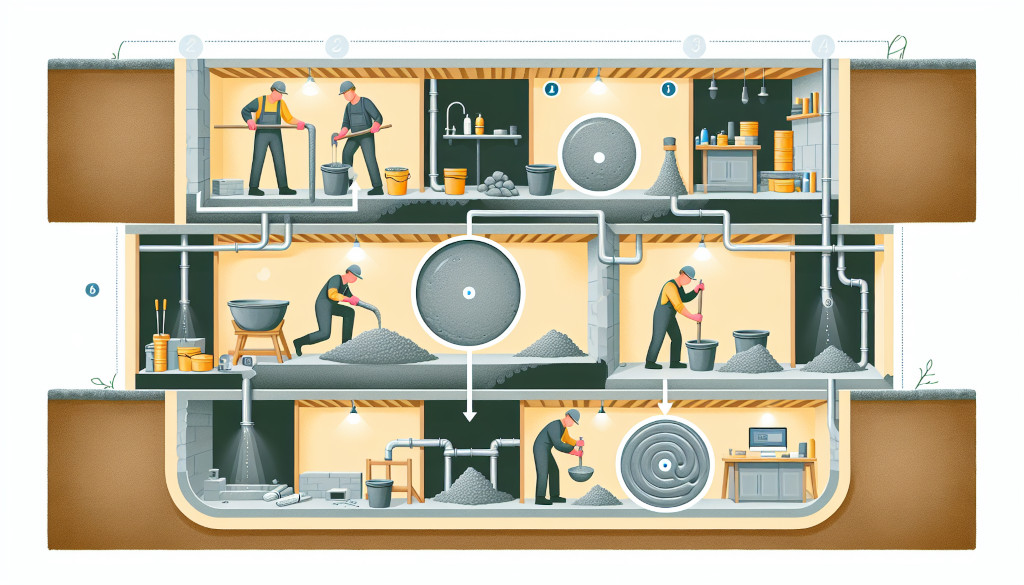
Once your basement has been properly prepared for cellar tanking, the actual tanking process can begin. This consists of preparing and applying a layer of tanking slurry, putting in place systems that include cavity drain membranes, and carrying out final touches such as decoration.
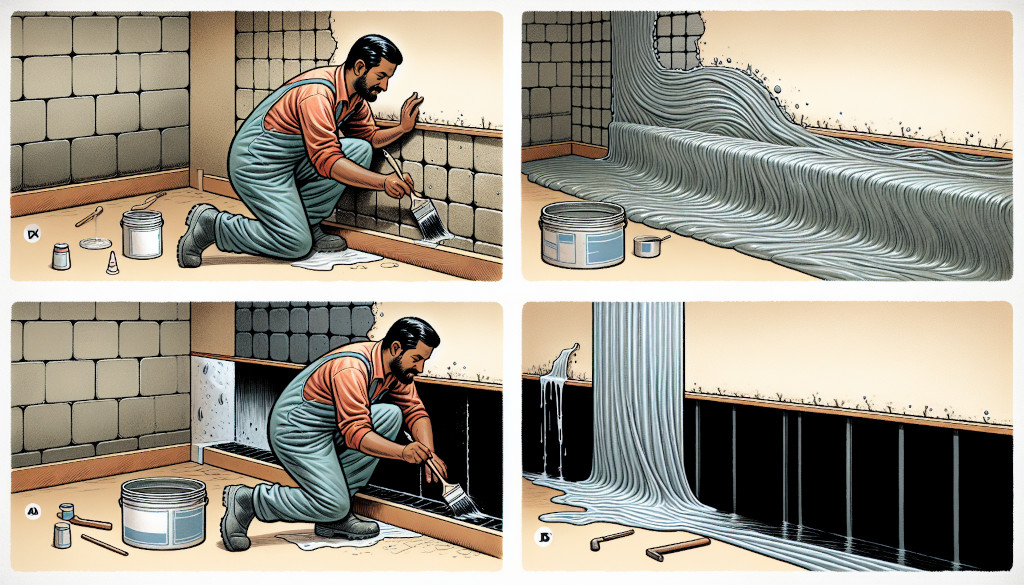
Mixing and Applying Tanking Slurry
To begin the process of tanking cellar walls, prepare and apply a coating of tanking slurry. Following the curing period for this initial application, continue with these steps to carry out the work with tanking slurry.
- Create a creamy mixture by combining clean water with the tanking slurry.
- Directly administer this blend onto damp surfaces in your cellar, including both walls and floors.
- Initiate coverage horizontally until reaching where the wall meets floor.
It is essential to add a second layer of tanking slurry at an angle perpendicular to that of the original coat once it cures so as to guarantee complete protection over every surface area.
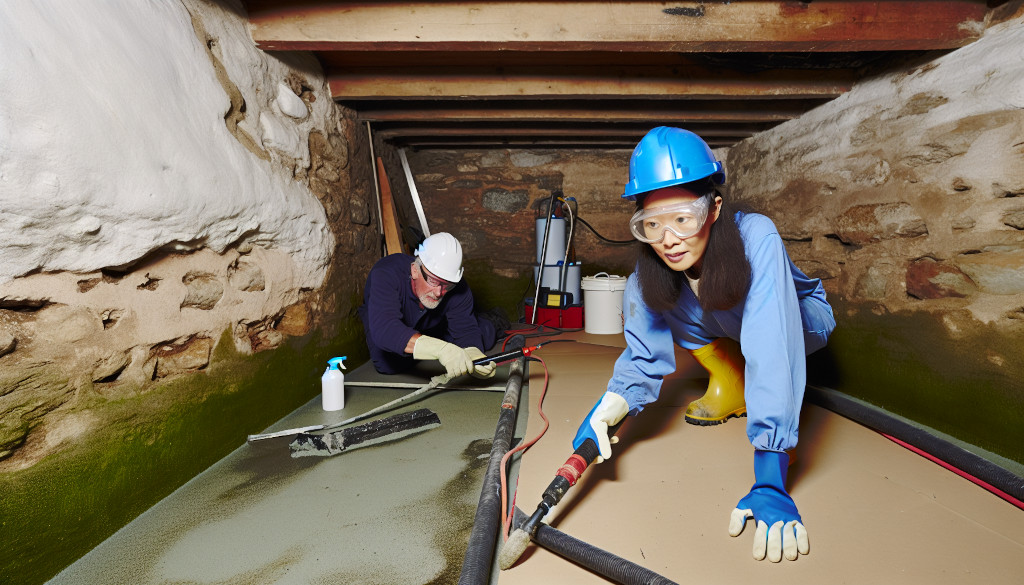
Installing Cavity Drain Membrane Systems
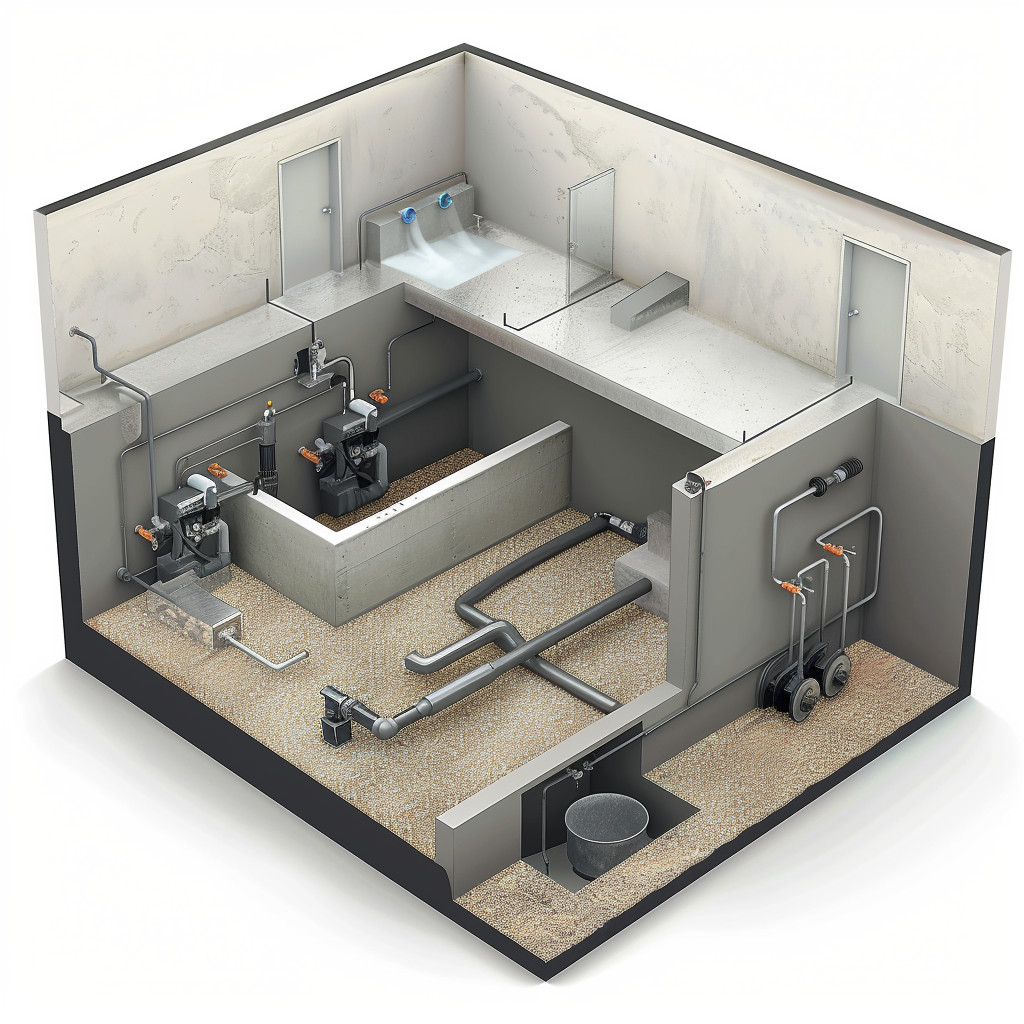
Upon opting for a cavity drain membrane system installation, you must first line the walls and floors with a specialised cavity membrane. Following this, establish a comprehensive cavity drainage system designed to direct incoming water towards either a sump pump chamber or an established drainage exit point.
The components of this system comprise wall membranes, floor membranes, fixing plugs specific for these membranes, dedicated drainage channels, and where necessary, the inclusion of a sump pump.
Finishing Touches and Decoration
Once the tanking process has been finalised, it’s necessary to proceed with the final steps. These involve laying down a floor screed over the cellar floor to safeguard the tanking layers beneath and implementing a third splatter coat in cases where rendering is postponed.
During the initial 12 months following this work, any interior decorating efforts should take into account moisture resistance so as not to encapsulate moisture within.
Estimating the Cost of Basement Tanking
It should be recognised that while basement tanking offers a wealth of advantages, it represents a significant investment. The majority of the expenditure for such projects stems from materials and labour costs. Factors influencing the overall cost include the dimensions of the area being treated, severity of moisture issues present, and choice of waterproofing method utilised.
DIY vs. Professional Services
Homeowners contemplating basement tanking must decide whether to undertake the project themselves or engage a professional. The cost of materials for DIY tanking is around £25 per square meter, whereas professional internal tanking services average at £60 per square meter. Although initially appearing more economical, hiring professionals may prove advantageous over the DIY route, particularly when addressing significant moisture problems.
Factors Affecting Cost
The expense associated with basement tanking is influenced by multiple variables. Primarily, the cost escalates in accordance with the extent of the space that necessitates waterproofing. A more spacious cellar demands additional resources and manpower, which increases expenses. Selecting different methods for waterproofing contributes to varying costs. For example, implementing cavity drain systems can range from £25 to £50 for each square metre—this estimate does not include fees related to expert installation or final touches.
Maintaining a Dry Basement
Maintaining a dry environment in your basement, following the substantial time and resources invested in waterproofing it, is of paramount importance. This requires consistent monitoring and upkeep to address any issues that arise from extreme hydrostatic pressure.
Regular Inspections and Maintenance
Regular inspections are crucial for the successful performance of tanking systems. For Type C waterproofing systems in particular, it is advisable to conduct a first inspection within three months following their installation and subsequent annual reviews should be carried out.
It’s important to perform routine examinations on exterior waterproofing systems as well, with an emphasis on confirming that drainage pathways continue to stay clear from blockages.
Dealing with Extreme Hydrostatic Pressure
Managing extreme hydrostatic pressure plays a significant role in maintaining a dry basement. For effective cellar waterproofing, especially in cellars prone to extreme hydrostatic pressure, the following measures may be required:
- Cavity drainage systems
- Drain tile system to redirect groundwater
- Sump pumps to eject water
- Vapour barriers to channel moisture into the drainage system
Implementing these measures can help manage hydrostatic pressure and keep your basement dry.
Summary
Investing in basement tanking can effectively convert a moist cellar into a usable, dry area. Though it requires considerable expenditure, this strategy not only safeguards the integrity of your home’s foundation, but also augments its value and improves usability. By selecting an appropriate waterproofing technique and maintaining diligent upkeep following proper preparation, you can ensure that your basement remains pleasant and moisture-free for many years ahead.
Frequently Asked Questions
What is the best tanking for a basement?
Utilising tanking slurry is the optimal method for ensuring strong and dependable waterproofing of your basement or cellar.
What is the basement tanking method?
Basement tanking involves applying a liquid waterproof coating to cellar walls and floors to prevent water ingress and treat damp, making the walls permanently watertight.
How much does it cost to tank a cellar UK?
When planning to undertake cellar tanking in the UK, it’s crucial to budget for the costs involved. Interior walls are priced at about £60 per square metre, while exterior walls might cost around £40 per square metre for tanking a cellar.
Is tanking a cellar a good idea?
Yes, tanking a cellar is a good idea as it provides an impermeable waterproofing coating to the walls and floor, helping keep the space dry. Therefore, it allows for full use of the cellar without moisture issues.
Can I tank my own cellar?
It’s not recommended to tank your own cellar as it can be a complex and expensive process with potential risks if something goes wrong, such as not knowing until it’s too late, and costly mistakes to fix.
Consider hiring a professional for this task.
For more information on transforming your damp basement into a dry, durable space, Future Build Cov Ltd invites you to reach out to us.
With over 30 years of experience, we specialise in carrying out basement tanking to the highest standards in the industry.
Whether you have questions about the waterproofing methods discussed in this guide or need assistance with your specific project, our knowledgeable team is ready to help.
Contact us for expert advice and reliable solutions to ensure the longevity and functionality of your basement.